Showing posts with label Infant. Show all posts

Monday, September 19, 2016

How to Make a Simple Mexican Poncho


Need a last minute, super easy to sew costume for a baby?  Try a simple Mexican poncho.  Then add a sombrero and maracas and that little one's costume is ready for Halloween in under an hour.

Supply List:
  • Fabric
  • Bias Tape extra wide double folded
  • Mini pom pom trim
  • Thread
  • 2" long x 1" wide triangle of black fabric
Measure your child's length from the top of the shoulder to the middle of the thigh or however long you want your poncho to be.  Multiply this number by 2 and add 1" for the seams.  

Now, measure from wrist to wrist plus 1" for seams.  The will be the width of your poncho.

Purchase fabric according to the above measurements times two if you want the lining to match the poncho.  

In the center of the fabric, cut an oval and a 4" slit. This will be the area the head goes through. Repeat this step for the lining fabric.  


Sew mini pom poms to the bottom of both widths of the poncho.
Now, pin the lining to the poncho, wrong sides together.  Sew around the large rectangle shape using 1/2" seams.  Leave at least a 3" long area to turn the poncho.  Turn and iron.  Baste the neck opening together.  Pin bias tape around the neck opening starting with the slit area and sew.  Sew the black triangle on top of the bias tape ends as shown below.  Wasn't that so simple?


Hopefully, your little one will entertain himself with the maraca and be happy.


 If not, at least you tried, right?  xoxo Grandma

Monday, November 9, 2015

Baby Blessing Dress Using Mommy's Wedding Dress


My daughter's wedding dress was a classic: lace with short capped sleeves.  Since she was getting married in October, she wanted the dress to look more like fall. So, we paid to have the dress altered and had the cap sleeves removed from the dress and replaced them with lace, elbow-length sleeves (as seen in the below photo). I asked that the original sleeves be saved and given to us, just in case I might ever need to use them. Those original cap sleeves were my inspiration for this baby blessing/christening dress.


To make this blessing dress, I took those original lace sleeves and cut them down to make the sleeves for this baby blessing/christening dress.  In an ideal world, I would have had more of the lace to use, but I can't say I didn't try. I even went to the dress shop where I purchased the wedding dress to see if I could purchase some. Sadly, the store informed me that it could take up to three months to get orders from this company and suggested that I cut into the train of my daughter's wedding dress, which I did not dare do.  So instead, I cut the leftover lace into pieces as shown below and then pinned those pieces onto the bodice in a random pattern. I tried an organized pattern but it looked awful! Then, I sewed all those little pieces in place - a very time consuming labor of love.


The pattern I used was the same one I used to make my daughter's blessing dress over 30 years ago (photos of that original dress can be seen here). 

I altered Vogue pattern #2878 slightly by adding pleats to the skirt instead of ruffles and shortened the dress by about 18 inches.  My daughter felt the original dress was ridiculously long. 


After finishing this dress, it needed a slip to add some volume to the skirt. But I wasn't in the mood to make the slip that came with the pattern because it was almost like making another dress.  Instead, I made a skirt and then sewed it to the bodice of the dress.  Of course I didn't think of this step until the dress was completely finished, so I ended up hand sewing it into place.  


Just look at those old looking hands, those are my hands holding this precious baby on her blessing day. Didn't the dress turn out so lovely?


So grateful that my husband and I had a lot of SkyMiles so we could be there when our newest granddaugter was blessed by her dad at church - it was such a special day!  xoxo Grandma

Linked to:  Project Run and Play You might also like theses blessing/christening dresses:
Here
Heirloom Dress

Thursday, January 22, 2015

Baby Bubble Dress - a Refashion


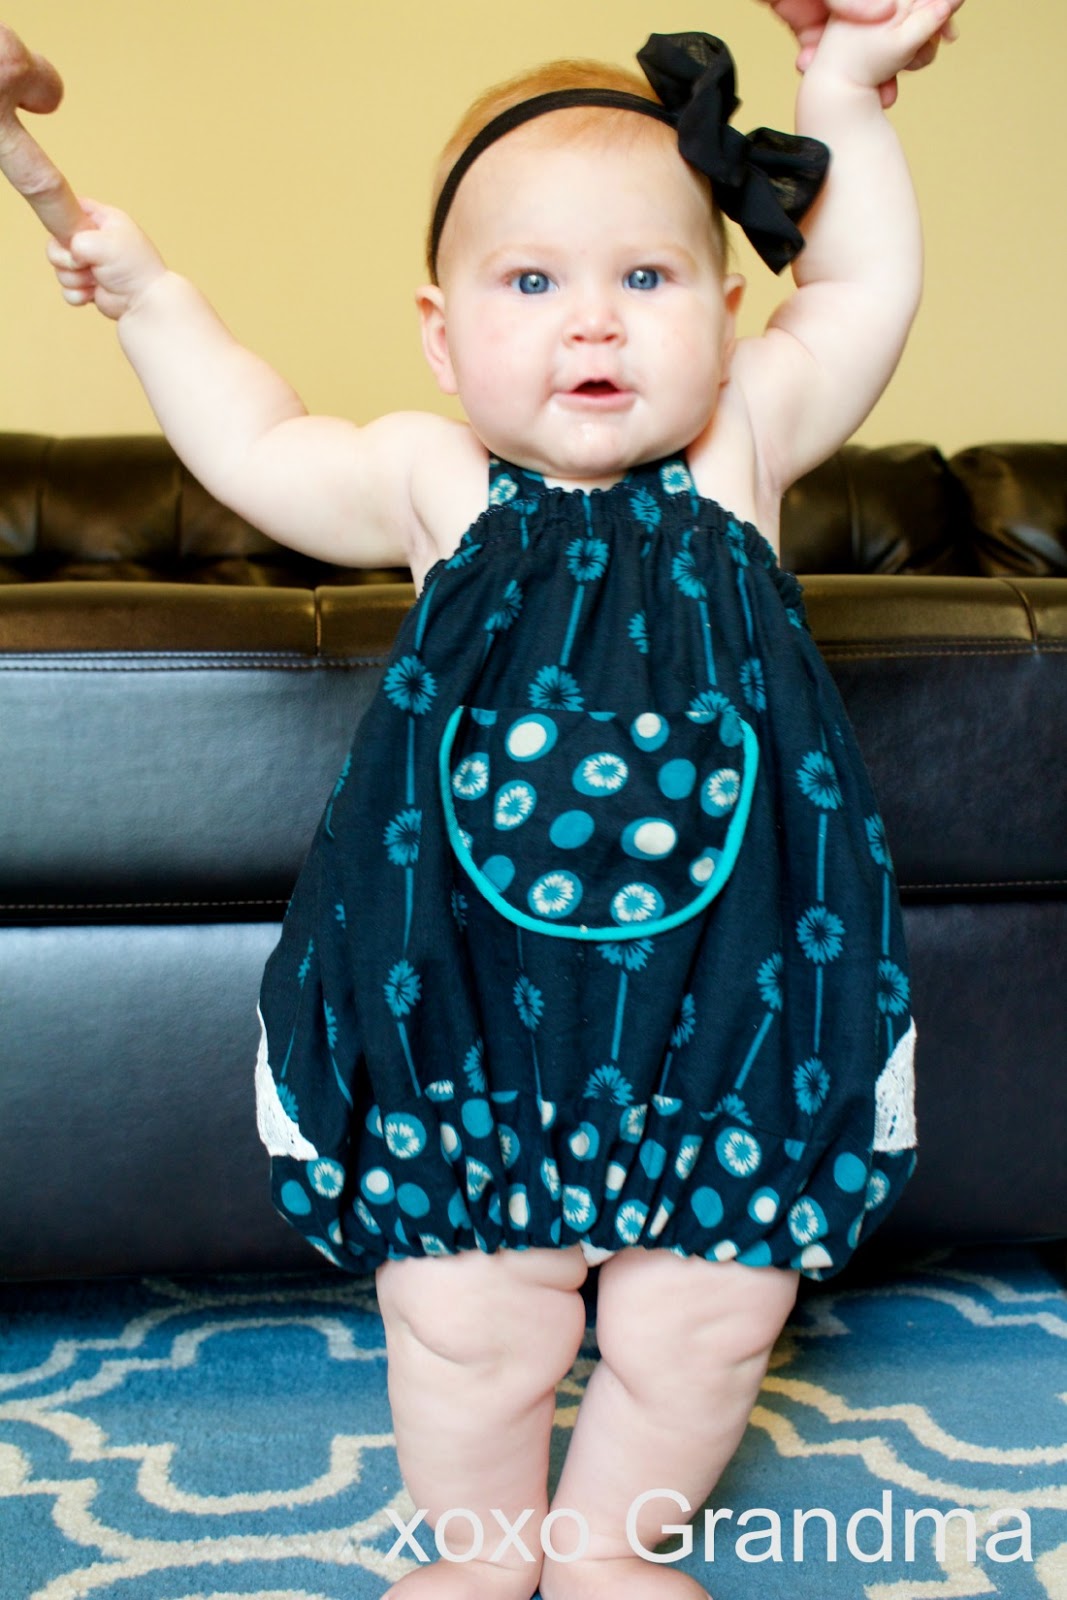
While visiting my daughter's family, I got the chance to sew a baby bubble dress for my almost eight month old granddaughter and to play along with Project Run and Play's January 2015 sewing challenge and Free for All at Frances Suzanne


I started this project with one of my daughter's old shirts. I really loved the black, ivory and turquoise fabrics, the colors compliment this sweet babies pretty blue eyes, and her delicious chub, perfectly.  


Here's how my creation turned out using Alida Makes tutorial changed up a bit to fit this little chubster (which is what her big brother calls her).  I took a square of lace and cut it into a triangle and added these pieces to the lower sides of the dress.  A trimming look to that thigh area!


I also inserted the elastic at the top of the dress eliminating the extra ruffle.  I didn't have elastic thread to use for the bottom shirring as directed in the tutorial and had no idea how to even find any in the foreign country my daughter lives in so I used 1/2" elastic and made a casing instead and luckily, it worked.  I also added a half circle pocket to the front of the dress to hide a hole in the fabric which is why the top was no longer worn.  My granddaughter hinted that she would like a pocket to keep a toy in...ha ha!


Don't you just love her rolls, blue eyes and red hair?  Yup, she's a cutie and her grandmother kisses her dozens of times a day just knowing it'll be a long time until I get to see her again.  (Sadly, my daughter swears she won't fly half way around the world to come home with her children until it's time for her husband's job to be over.  I understand, honestly I do....I even had a hard time with the long, long flight over here.)


I sure enjoyed refashioning this top into my version of this bubble dress baby style.  I mostly enjoy my time with this little girl's family.   Do you like bubble dresses on babies?  xoxo Grandma

Linked to: Threading My Way, Creating my Way to Success, Frances Suzanne

Sunday, July 20, 2014

Baby Girl Gingham Smocked Dress

Last week, I spent the weekend with my siblings at a family reunion on the Oregon Coast. It was so much fun!  I also got to spend a day with this beauty: my 7 month old granddaughter who is one of the happiest babies I know!


For this dress, I started with more of that yellow & white gingham fabric which I inherited from my mother. It just never seems to run out.  I smocked this dress using white embroidery floss and accenting with purple floss that I stitched into flowers with soft green floss for leaves.  Smocking is tough!  Anyone have any smocking advice?  I've read that if you smock using gingham, it's easier.  My older sister suggested making the dress first and then smocking it afterward.  Here's my thoughts on the matter- maybe it's easier for some people but for me, NO, it was not.  So, this is it, I'm not smocking another thing ever or at least not again until I loose my memory and forget that I made this vow. Despite my smocking woes, this dress still turned out pretty cute... especially on this sweet little girl! 


In one week's time this little trooper flew internationally, crossed the country, made several 3 1/2 hour drives and through it all, she kept smiling.  By this time, I'm guessing this cutie was thinking "Yea, they let me out of my car seat!"


Yes, that's me getting a little loving before this granddaughter had to get back into her car seat and drive over three hours again back to her home. So grateful for family! - xoxo Grandma
Pattern: Simplicity #7239 - cira 1975
Fabric:   yellow & white cotton gingham, white cotton for the collar and the interfacing.

Linked:  The Dedicated HouseNap Time Creations

The Dedicated House

Tuesday, November 19, 2013

Cute Burp Cloths

Every mother needs burp cloths for all those fun moments when babies do their thing.  I like soft, flannel burp cloths for babies, but one of my daughters prefers how the cloth-diaper burp cloths better absorb all that fun baby slobber. 

While shopping, I found a package of baby washcloths for 25 cents. I love a bargain and I purchased them. Since they are so, so soft and designed to absorb liquid, I decided to try adding them into my burp cloths to help with the absorbency issue. On one burp cloth, I added the washcloth fabric to the decoration and to the middle of the cloth.  I designed another wash cloth onto the back of the design.  As you may remember, my daughter's baby's room theme is Teddy Bears Picnic so I tried to design images that went along with that theme...teddy bears and picnic baskets.


It will be interesting to see what kind of reflexes this newest grand baby has. Just a couple of weeks now and she'll hopefully make her appearance, then we'll know for sure. 

What kind of burp cloths do you like best?
For more fun ideas go to The Dedicated House
xoxo Grandma