Monday, June 3, 2019

"Camp Grandma" a Unique Book


A newly published book about ways to turn time with your grandchildren into fun, creative learning activities is "Camp Grandma Next-Generation Grandparenting - Beyond Babysitting" by Marianne Waggoner Day.

The author of this new book, Marianne Waggoner Day, use to be an executive for a large commercial real estate company. After she retired from her job, using her executive skills, she put together a creative yet educational way to spend time with her grandchildren. Instead of just "babysitting" her four grandchildren, she organized her time with them and began to teach them useful life skills.


The week before these four grandchildren moved back from living in Japan for five years, I finished reading this new book. Since these cuties have been visiting us, I've been very, very busy! I've already started to incorporate a couple of these ideas with the older two grandchildren who are 7 and 5 years-old. They're meeting a lot of our friends and I appreciated the idea of teaching my grandchildren how to politely meet our friends and neighbors. This book is a unique tool for grandparents that live near their grandchildren and often babysit while their parents are working. Sadly, that's not me but I did gleam a lot of great ideas to use with my grandchildren when I get the privilege of spending time with them.

At the end of this month, my 13 grandchildren, children and their spouses will get together for our first family reunion in five years. One of the ideas I read about in the chapter,"The Ancestor Within," will be used at this reunion. I'm excited to see their reaction as they learn about some of their ancestors who have passed away and were important to my husband and myself.

Grab a copy of this book if you too want to learn more techniques in being a better grandparent. It's a quick read and I bet you'll gleam something from it too.

xoxo Grandma

I received an Advance Reader Copy of this new book for my review.
You can find this book from Amazon, Barnes and Noble and Target.


You also might like reading this post called, "20 Tips For Long Distance Grandparents".

.

Wednesday, November 1, 2017

10 Simple Sewing Projects for Beginners


I've been teaching sewing to beginners for a few years now and thought I'd share ten of my students' favorite simple sewing projects. 

If you're looking for some simple projects to teach to a new sewer, you might want to consider teaching them how to make one of these. These projects are cute, fun and about as easy as they come for beginning sewers! 


1.  30 Minute Stuffed Animal here.


2.  A Sling Bag is a fun beginner project, especially for tweens. Go to this post for ideas on how to make this bag and a link to the free pattern.


3.  Hot Pad Holder tutorial found here. This is a perfect project for learning to sew on bias tape.


4.  Doll Chef Hat here. A simple project for learning how to gather fabric and sew a band onto a gathered edge. Plus, if you're teaching a young girl how to sew, she'll love having a new accessory for her doll! 


5.  Simple Pouch Bag. Learn to sew a zipper into a little bag. You can use a linen napkin for the outside of the bag as shown here or cut a piece of fabric and sew a simple pouch as explained in this tutorial by Melly Sews.


6.  Simple Skirt here by sewVery Simple. This is usually the first project I have my students make. They learn how to make a casing, one seam down the back and a rolled hem. It's a quick project to sew but it'll take a beginning student at least an hour to 1 1/2 hours to make this kind of skirt.


7.  Refashion a Skirt into a Dress here. A super simple dress can be made by adding a skirt to a ready made top and with just one sewn seam, you'll have a dress. This project shows this simple technique. I've personally used this tutorial to make myself a few dresses.


8.  Make a Twisted Headband out of knit fabric. You'll find a simple tutorial here. A really resourceful way to make this headband is to use an old knit shirt as the fabric. Simply cut the shirt into 5" wide stripes and along the seam, cut the stripes into 19-21" pieces. This is another perfect project for tweens and teenagers.


9.  A Bow Tie is a great project to learn how to turn tubes right side out. This is especially a fun project if the student wants to make a gift for a little boy. Go here for the free pattern and tutorial. It's a darling, easy project! 


10.  Panel Dolls. Moda has some fun, easy pre designed kits called "Cut and Sew" like "Little Red" and "Queen of the Sea." You simply cut out the images (which include a doll, pillow, blanket, skirt and a little friend), sew, stuff and you're done. Even a 5 year-old can help with this project. See this post for tips. 

Sewing can be simple and fun, especially when you have a tried and true beginner project. Do you remember the first thing you ever sewed? I'd love to hear about it! 
xoxo Grandma

Monday, October 23, 2017

Make a Child's Red Bird Costume


"Please Grandma, would you make me a red bird costume?" I asked my granddaughter what she would do if she was a red bird. She responded, "I'd fly, of course!" As you can see, she now can spread her wings and try to fly! 


As I gave her this red bird costume, we talked about how she really wouldn't be able to fly but she could have fun pretending to fly. I didn't want her jumping off her two story deck thinking she'd be able to fly! You know how children's imaginations can go wild! 


Occasionally, this red bird was able to flap her wings and jump just enough to get some air. Now, on to how I made the costume!

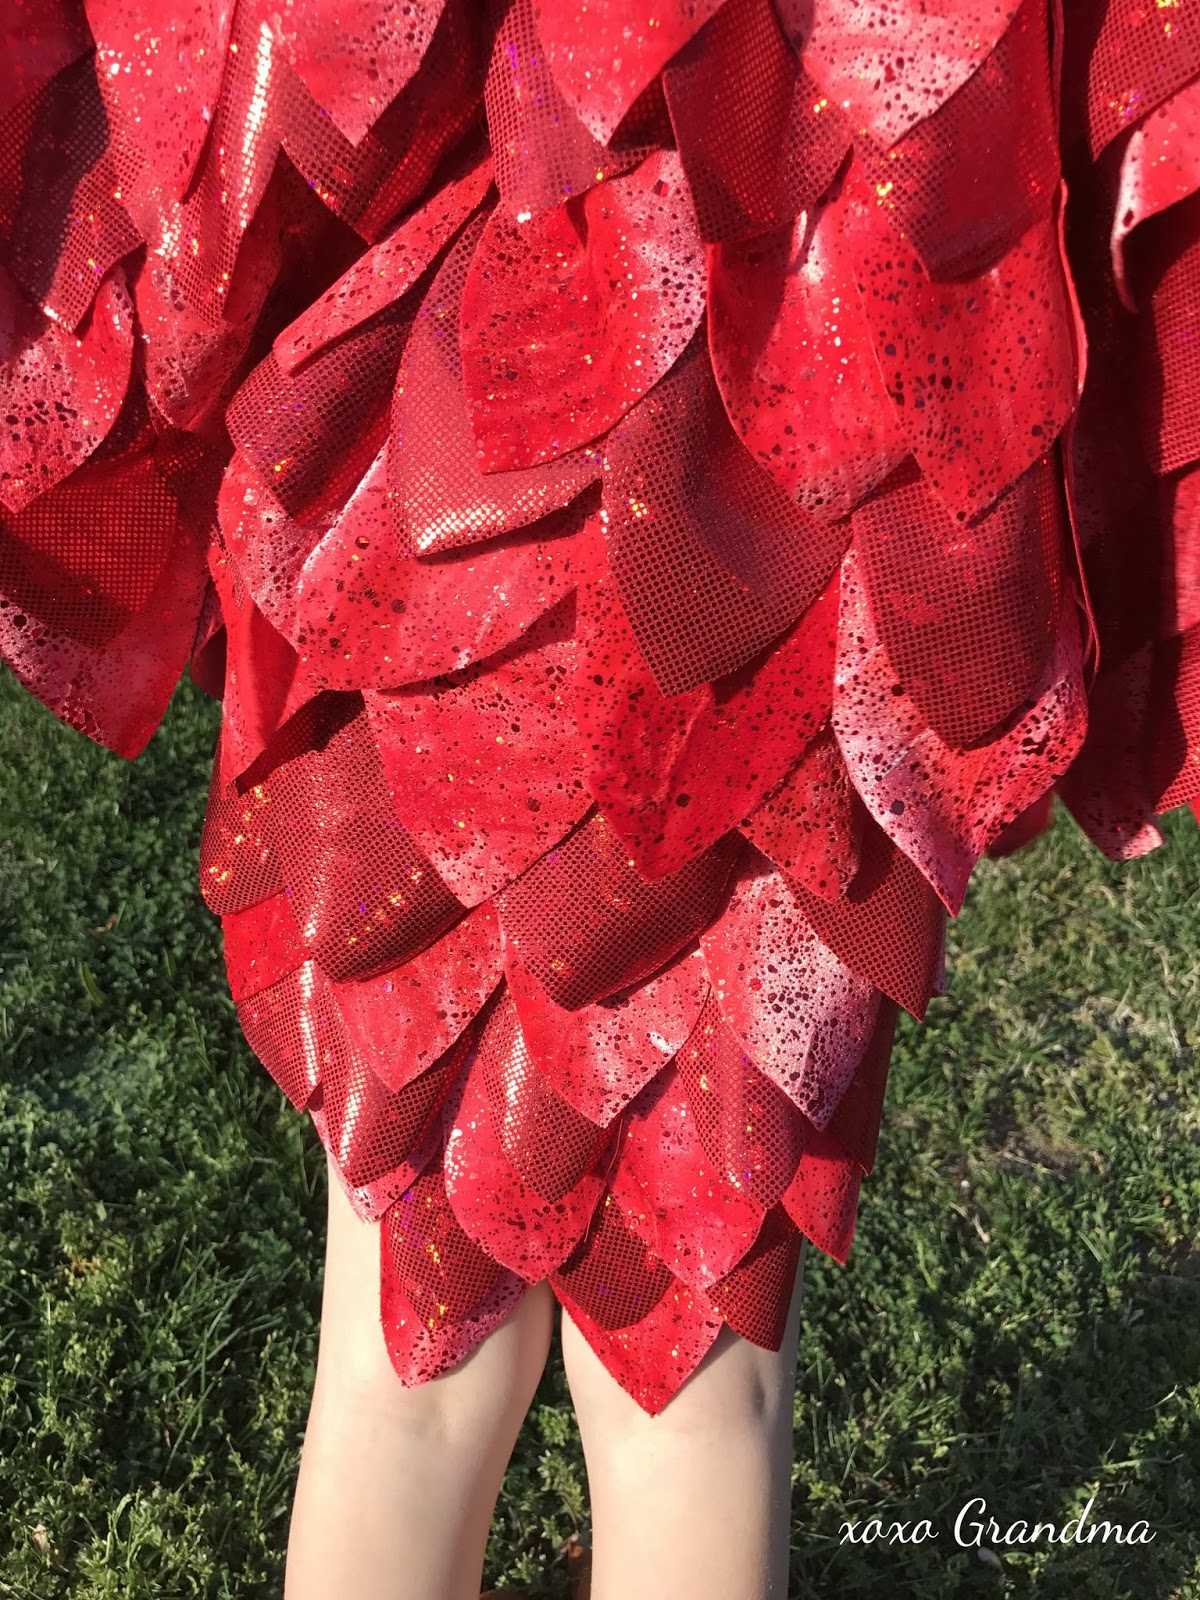
For the main body of the costume, I used a super soft, jersey knit. The wings and half of the feathers were made from a metallic red spandex. The stomach and the other half of the feathers were made from a stretch knit, red splattered velveteen fabric.

The pattern I used was McCall's M6785.  I used the body for view C. 

The only thing I wish I had done was make the neck smaller because when I sewed the wings in place, the fabric feathers made them kind of heavy and pulled the neck down. You can learn from my errors. 

Notice the back tail feathers (you can see it a few photos below). I redesigned the back pattern piece so that the bottom had a long curve down like the size of half of a luncheon plate. Then I sewed on the feathers just like I did for the wings. (More about that in a minute.)


A while after I began working on this costume, I came across these bird feet in my costume bag. I created these when my son (my granddaughter's father) was about her age. It makes me laugh to think that I wore them with a blue bird costume I made out of a high school prom dress - sorry, I don't have any photos (that's probably a good thing). I washed these bird feet, cut them down to fit a six-year-old's feet, and added new elastic.

Lastly, I re-positioned the Velcro on the back straps to fit a child's ankles. Who would ever guess these bird feet would come in handy when they were first made so many years ago?


One of my favorite things about this costume is the mask. I started with a Mardi Gras mask that I purchased and never wore. I pulled off all the elements from the original plastic mask form and using spray glue, I added the same red splattered velvet fabric to the entire mask, that I had used for the wings and on the stomach. Before adhering it to the mask, I traced with a pen the eye openings onto the wrong side of the fabric. Then using scissors, I cut out the eye holes. 

The beak was made from yellow felt which I reinforced with iron-on interfacing. Once the beak was in place, I embroidered the brown markings onto each side of the beak. Then I glued on gold sequins along the top edge of the beak.

The final touches were to glue a yellow rhinestone to each to corner of the mask. Then, I glued the original gold trim around the eyes and the outer edge of the mask. 

Lastly, I glued a piece of leftover red boa onto the top of the mask. This element kind of looks like hair, doesn't it?


The wings were made by cutting out a lot of fabric feathers. I overlapped these feathers and sewed them onto a wing shaped piece of fabric. I alternated the rows of feathers with a row of shiny red and then a row of velveteen red splatter. After the wings were filled with feathers, I sewed them onto the back seam of the bird top. 

To keep the wings attached to her the red bird's arms, I added elastic straps that went over her sleeves. One strap was added to the wrist and another right above her elbow. For the one above her elbow, I cut a piece of the red shiny spandex fabric. That way this strap blended in with her costume.


I sewed the red boa onto the neck, around the sleeves, and around the stomach piece of the costume using a large zig zag stitch. I sewed as close to the middle of the boa as possible. 

To wear under this red bird shirt, I purchased red shorts. Some things in life just need to be easier. I'm sure you'd agree! 

Once I sewed the costume together, I took a long, long trip before my granddaughter could try on this brightly colored bird costume. 


I'm really curious to know what her Australian neighbors thought this crazy little American was squawking about? But maybe they just thought it was one of the local birds because they all seemed to have a loud squawk. 

Halloween is just around the corner! What are your children or grandchildren dressing up as? xoxo Grandma

Other costume ideas:
Mermaid Costume
Baby Carrier Shark Costume
Flintstone Family Costumes


Monday, October 16, 2017

Make a Child's Mermaid Costume


How many of you have a child that likes to pretend they are whimsical creatures? A few months ago, this little girl and I were Facetiming and she asked me to please make her a mermaid costume for her birthday. I can never turn down such a request-- especially from a grandchild. So I whipped out my favorite mermaid pattern and got to work! 

When I was visiting her family in Australia, they took me to the beach for several days and I had a chance to photograph her as Seaena the mermaid. She made-up a story of her life off the coast of Australia and how she and her mermaid baby liked to sit on the rocks and sunbathe.

It's always nice to have a fun story to go along with your costume. Such imaginations! 


To make this mermaid costume, I used the following two patterns: 


Butterick #5597, I liked the top of this mermaid pattern. I used the pattern piece to make the scallop shells-- only my granddaughter wanted orange shells, so these were made out  of an orange taffeta. I also liked the idea of sewing these onto a ready made, nude, long sleeve leotard. 


To make the mermaid skirt, I used the pattern from Simplicity #8198. The spandex fabric I used had wonderful fish looking scales. It was really easy to sew on. I purchased my fabrics and the leotard from Onstage Dancewear. They are a family owned dance store that custom makes dance outfits. They have an amazing assortment of fabrics for costumes.


To make the crown, I used some ivory lace that I already had. I sewed it together to form a circle. Then with hot glue, I added seashells of various sizes. The final touch was to hand sew a few pearl-looking beads onto the lace. 


With the leftover fabric, I surprised my granddaughter and made her a costume for her American Girl doll. I had plenty of fabric leftover to make three more additional doll mermaid costumes. 


Here's a close-up of the doll's mermaid crown, which looks very similar to the child's crown. The only difference was I used the smaller shells on the doll crown.


My favorite part of this costume was walking to the beach with my little mermaid. It was fun to hear the comments she got and to hear my granddaughter exclaim, "Grandma, did you hear how much they like my mermaid costume?!" Yes, I did hear and I'm so happy I could witness her joy at the beach!  

xoxo Grandma

Tuesday, October 10, 2017

Make a Halloween Baby Carrier Shark Costume


Get ready to turn heads with the cutest baby in town on Halloween! 

Last year when the cute baby in the photo above was born to my niece, I asked my niece what she wanted or needed for the baby. She told me all she wanted was a baby carrier costume. Music to my ears! Costumes I can do! They're one of my favorite things to create! But a baby carrier costume? I was stumped. I honestly had never heard of such a thing. 

I asked my niece to share photos with me of what she had in mind. She showed me this image of a shark costume. Since the article only explained how to create this costume, but failed to offer a pattern or photos, I'm expanding on this Halloween Baby Carrier Shark Costume idea with a FREE pattern. Trust me, it'll make things a lot easier! 

So... here we go! Get ready to create the easiest, most darling baby costume in town!

HERE is the link to the free baby carrier shark costume pattern. Make sure you print the pattern without shrinking it. 

Let's get started!

Supplies needed

Grey felt
Black felt
Red flat bias tape
White pellon, 1/8 yard
Fiber fill
Grey thread
2 large googly eyes
Glue
4-6 Medium to large safety pins


Directions:

1. Cut out 2 of the bodies from grey felt. Cut a hole for the shark mouth in one of the bodies. 

2. Cut a piece of black felt a little larger than the mouth opening.
3. Cut out teeth from heavy white interfacing like Pellon.


4. Sew the teeth in place. 
5. Sew the black backing behind the teeth.
6. Sew red flat bias tape around the mouth mitering the bottom corners so you get a sharp pointed edge.
7. Right sides facing, sew the grey felt bodies together, leaving an opening to turn them right side out.
8.  Clip the corners and rounded edges.
9.  Turn the shark body right side out.
10. Lightly stuff the shark body with fiber fill.
11. Sew the opening closed.


12. Glue the googly eyes in place
13.  With large safety pins, from the back side of the baby carrier, safety pin the shark body to the carrier.

To complete the costume, dress in black, add swim goggles for you and your little one, and throw on a multicolored blue tutu skirt... you know... because your outfit is going to need a little splash too (pun intended)!  

Happy costume making! And Happy Halloween! 
xoxo Grandma

More costume ideas:
SaveSaveSaveSave

Friday, September 15, 2017

The Flintstones Family Costumes


Are you and your family Halloween fanatics? Are you into choosing a theme for your family costumes? If so, and you love dressing up, you'll love this post. 

My youngest daughter's family loves Halloween and getting all decked out every year. She's a redhead and so is her daughter, so she thought it'd be perfect to choose a Flintstone family theme. To prep her young kids, she let them watch a few episodes of the Flintstones, since they had no idea who they were. Talk about making me feel old!  


The Dino costume was created by using Simplicity pattern #2506, view C. I used a light weight fuschia cotton fabric. If you live somewhere that's colder in October, I'd suggest using fleece. 


The Dino name tag was made out of felt. I cut out two bright yellow circles and with black floss, embroidered the name onto one circle. I added heavy interfacing to the circle and then sewed the pieces together. With black embroidery floss, I sewed the name tag onto a turquoise neckband. The neckband was 3/4" wide and hook and loop were used to hold the neckband together.


On the back of the Dino costume I added random back spots. The black strands on top of the head were made of black fleece. In retrospect, I wish I would have inserted pipe cleaners inside the strands so they would have stood up.


Pebbles shirt was made from a simple lime green cotton fabric. The pattern used was Simplicity #4927, view B. I cut out random black triangles and machine embroidered those onto the fabric before I sewed the top together.  With this shirt, she wore a blue shorts that she already had on hand.

Of course, a white bone is necessary for a cave girl's hair. I cut out two bones out of white felt. Then I sewed the bones together leaving a small opening to turn the bone. I hand sewed an elastic onto the center of the bone to make it easier to attach to hair. If you want to make a bone too, here is the free pattern for the bones I made for Pebbles and the Bam Bam costumes. 


For Bam Bam's costume, I used a basic boy's short pattern. Before I sewed the shorts together, I sewed onto the fabric random, black triangles. The best part is the shorts hem was cut randomly to give it a tattered look. I used a solid brown fabric and cut two slit like buttonholes into the bottom of the strap piece. I made two white bones to put into the slits. 


My grandson's favorite part of the Bam Bam costume was the club. My recommendation for the club is to use a good sturdy fabric. I used felt and felt just doesn't hold up well. I also inserted a dowel into the club before sewing it up, so it wouldn't flop over. The club has dark brown wood type lines machine embroidered onto it. 


Bam Bam's hat was purchased here. I hand sewed the black triangles onto the hat. Then I hot glued a jumbo white pom pom onto the middle of the hat. 

The parents were on their own for their costumes. 

Do your children or grandchildren know who the Flintstones even are? Happy dressing up! xoxo Grandma

Some of the items used to create these costumes can be found here:
  

Thursday, August 31, 2017

Nautical J.Crew Knock-off Sundress


Before this spunky girl went on a trip with her family, I got a request to make her this nautical J.Crew "Knock-off Sundress." 

I made this same dress last summer for two other granddaughters after my daughter fell in love with this style at J.Crew. It was a bit too pricey, even at the outlet, so I figured out how to make it. 

It's summer weather around 80% of the year where my cute granddaughter in these photos lives, so even though it's almost September, she'll be wearing this for another couple of months.


Good thing I didn't wait too long to make it because this sundress arrived the day before her family left on their trip.


I loved and laughed at all the poses this girl came up with for these photos. And don't you just love her choice of shoes? She told her mother that the color matched the dress and who's going to argue with a 3 year-old if they are happy?


The free pattern used to make this sundress can be found here. If you haven't downloaded this pattern, you'll want to. It's pretty simple to make!

The nautical fabric is from Michael Miller and can be found here.


She's such a fun girl! Doesn't her attitude just come right out in these photos? 

How long does summer weather last where you live? Not long enough at my house! 
xoxo Grandma


Link to the fabric used: