Showing posts with label Fairy. Show all posts

Wednesday, November 18, 2015

Make a Christmas Fairy Cottage

It's time for another fun project, but this time with a Christmas twist. I've joined with bloggers around the world to bring you a few weeks worth of Christmas fairy projects (see the complete list at the end of this post).  


Today, I'm sharing with you how to make a Christmas fairy cottage.  This makes a cute decoration or toy or it can easily be turned into a night light by adding an LED light.

Do you want to join in the fun?  To begin this project, download this free Christmas fairy cottage pattern here. You'll also want to go to this post for additional free patterns and instruction to make this and other snugly fairy abodes.

Supplies needed:
  • 4) .875" (2.22 cm) bells
  • Embroidery floss:  green (several shades), brown, white
  • Felt scraps, green(s) and white
  • Pipe cleaners, any color
  • Scissors
  • Needle
  • 1 wool sweater or felt
  • Scrap of netting or tulle
  • Batting
  • Heavy pellon interfacing
  • Empty salt container
If you're using an old sweater, you'll need to shrink it in hot water and then dry it using a hot dryer setting. A wool sweater work best. Now, cut off one of the sleeves.  I cut my sleeve down to 17 inches long.  This sleeve will be the basis for your Christmas fairy house. If you're using felt, cut a rectangle the width of your container and the height of your container plus 8 inches to wrap all the way around the container. 


Cut out 2 pieces of your felt scraps and one of interfacing to make a door.  Sandwich the interfacing between the felt and sew using a blanket stitch, either by hand or with a machine, all around the door.  Stitch by hand around felt leaves (I used 7 leaves) and cover the door by slip stitching these leaves in place.


Cut out two windows and sew some tulle onto the wrong side of the openings.  To hide the stitching, hand embroider around the windows using a blanket stitch.


Embroider around the door frame using a blanket stitch.  Now pin the door in place.  Sew the leaf door to the door frame.  Add a bead door knob and a latch because a fairy needs to keep the cold out of their house in the winter.

Decorate your cottage with additional felt and embroidered leaves, snowflakes and at least one felt Christmas stocking.


At the top of the sleeve, cut four even stripes 8 inches long by around two inches wide. Sew pipe cleaners into the top stripes making a tube.  The pipe cleaners allow the top pieces to curl and take shape.


Take your empty salt container and with the tip of a seam ripper or large needle, poke holes around the Windows and door opening.  Using an exacto knife, cut out the openings.


Slide the decorated sleeve/felt onto the prepared salt container matching up the openings and glue or stitch these two items together.


For the base, layer one piece of heavy pellon between two layers of batting.  Sew around the edges using white thread.  Now, sew the cottage to the base, tucking the raw edges of the sweater (or felt) under the salt container.


Fairy cottages are just so much fun to make because there's no right or wrong way to do it.  If you make one, make sure you leave the door open at night so a fairy can have a warm place to spend a winter's night.  

 xoxo Grandma 


Friday, July 17, 2015

Make a Simple Fairy Hammock


Most children love helping with craft projects. So, this summer, make a fairy hammock with your child out of twigs and a few other supplies you may already have.

Supplies needed: 
  • Leather cord
  • Netting about 8" long
  • Twigs (Cut 2 sticks that have a "V" shape.  The sticks need to be cut to the same length.) 1 stick that's for the cradle base.
  • Jute
  • Scissors
  • Super glue

1. Make a slip knot at the end of the leather cording.  Attach to the end of the cradle base twig.  Pull the end tight.
2.  Wrap the leather around the base and the legs, creating an "X" as you wrap.
3.  Repeat step 2 to attach the twig onto the other legs.


4.  When finished wrapping the leather cord, your hammock base will look like the first photo.
5.  Bunch the netting with your fingers and tie it onto both sides of the top portion of the cradle bases.
6.  Add a drop of super glue to all the joints and around the netting.  Let dry.
7.  Once completed, your fairy hammock should look like this:


Time to sing a little rock-a-bye song for some little imaginary garden friends as your child plays outside.  xoxo Grandma


Part of this post was originally shared as "Fairy Fun" with Nap Time Creations.

READ THESE POSTS:
Fairy Cottage:

Or a fairy house like THIS.  


Fairy Named Locations HERE


Thursday, July 16, 2015

Fairy Named Locations

Skye Fairy Pools, Scotland - photos copyright by Lindy Minert 
This summer, take your children or grandchildren on a hike or enjoy a peaceful walk to one of these "fairy" named locations throughout the world:

Locations in the United States:
Alabama:  Fairy Alley in Hueytown 
California: Fairy Falls or Pixie Woods Amusement Park
Colorado: Fairy CavesFairy Gardens and Fairy Hills
Connecticut: Nature Walk with 100 fairy houses and Fairy Lake
Georgia: Fairyland Elementary in the town of Lookout Mountain 
Idaho: Fairy Gardens
Illinois:  Fairy Festival in South Eljin
Indiana: Enchanted Fairy Trail
Maryland: Faerie Festival
Minnesota: Fairy Lake in Sauk Centre
Mississippi, Fairy Lane in Vicksburg
Missouri: Fairy Cave Lane in Mark Twain National Forest
Montana: Fairy Lake
Nevada:  Fairy Falls and Dry Creek Loop
New Hampshire: Fairy Houses Day
New Jersey:  Fairy Lake in Hudson County
New York: Fairy Trail and Fairy House Tour
Ohio: Fairy Lane in Carlisle
Oregon: Fairy Falls
Pennsylvania: Fairy Festival 2015
Tennessee: Fairyland Caverns
Texas: Fairy Homes in Zilker Botanical Gardens
Utah: Fairy Forest and Fairyland Trail in Bryce Canyon National Park
Vermont: Fairy House Festival
Virginia: Fairy Stone State Park
Washington: Fairy Falls and Fairy Bakery
Wisconsin: Fairy Springs Road in Hilbert
Wyoming: Fairy Falls and Fairyland Basin in Yellowstone National Park
International Locations: Australia: Port Fairy
Canada: Fairyhill, Saskatchewan
China: Fairy Bridge
Jamaica: Fairy Hill
Ireland: Templemore Park Fairy Trail
New Zealand: Fairy Falls
Scotland: Fairy GlenThe Fairy Knoll, Fairy Pools & The Fairy Bridge 
Turkey: Fairy Chimneys
Vietnam: Mui Ne Fairy Stream

You could also go for a drive or take a bike ride down a road with an enchanted name.  For a list with places in the United States to go HERE.  xoxo Grandma

This post was originally shared at Nap Time Creations.

Other Fairy Posts:
READ THIS POST HERE

Wednesday, July 15, 2015

A Summer of Fairy Magic


This post was originally shared over at Nap Time Creations but if you missed it there, I'm going to highlight a few of the things I shared. This summer I've planned a little extra special magic for my grandchildren when they come to visit us. Since I have some pretty girly little granddaughters, I've planned several activities around fairies, including stories, treats, crafts and fun outdoor activities. Take note of these ideas and join us in the fun!

FAIRY STORIES

To start out that fun, I plan on reading to my three and five year old grandchildren, "The Night Fairy" by Laura Amy Schlitz.  This is a chapter book with beautiful illustrations. The story is about a night fairy named Flory. When she was three months old, her wings were injured by a bat. She falls into a human's garden and because of her injury, she can't fly away. It's a darling book I know they will enjoy.    


Reading chapter books with younger children can also be entertaining. Another fun chapter book to read to older children is "The Fairy Rebel" by Lynne Reid Banks.  This is a fun chapter book about a woman who is sad. When she goes to her garden, she meets a fairy and then confesses to that fairy that she really wants a baby.  Let's just say this fairy livens up this women's life.


If you have younger children, a really enchanting fairy book is "The Faerie's Gift" by Yanya Robyn Batt. The illustrations are beautiful. In the story, a kind woodcutter helps a faerie that's in trouble.  In return, that faerie gives the woodcutter a very special gift. I loved this story and how the woodcutter uses his gift to help his family. 

When you're done reading this book, ask your child what wish they would ask for if they were given just one wish.  My grandson said he would wish for all the bad guys to go away and then all the jails could be taken down.  I told him that sounded wonderful.

FAIRY TREATS

When stories are through, doesn't everyone like a good treat? My grandkids do! We'll be making fairy dust. My grandchildren helped by stirring the ingredients together.  This magical treat is so easy to make and the best part is there is no hot summer baking. Here's how to make it:


Fairy Dust Recipe
  •  1/4 c. powdered sugar
  •  1/4 c. granulated sugar 
  •  Red or pink food dye. 
  •  Strawberries, raspberries, grapes or bananas
  •  Colored toothpicks
With a spoon, mix together the sugars and stir in two to five drop of food gel or food dye until the sugars have speckles of color.  Cut up fruit as desired and add colored toothpicks to each piece of fruit. Dip the fruit into the fairy dust.  

We'll fill a very small container (I'm talking really small, like a toothpaste cap) with this mixture and then I'll have the children take it to our garden and leave it for the fairies to enjoy.  Make sure you don't put it where ants frequent...that could bring unwanted guests to your party!

ACTIVITIES

Online at Flower Fairies Fun and Games there are free computer games, printable activity sheets, and coloring pages which are always fun for children.

Please join me tomorrow for more fairy ideas.  I'm enjoying my son's family this week.  I hope you get to enjoy family too! -xoxo Grandma
Other posts about fairy crafts:


How to Make a Fairy Cottage go HERE or house go HERE.


Friday, June 12, 2015

Guest Post - A Summer of Fairy Magic

Hi, today I'm happy to be a guest blogger over at the cutest blog, Nap Time Creations. My guest post is about as whimsical as they come (at least for me). It's called, "A Summer of Fairy Magic".  Go read about the fairy magic activities I've planned for my little summer visitors HERE.  

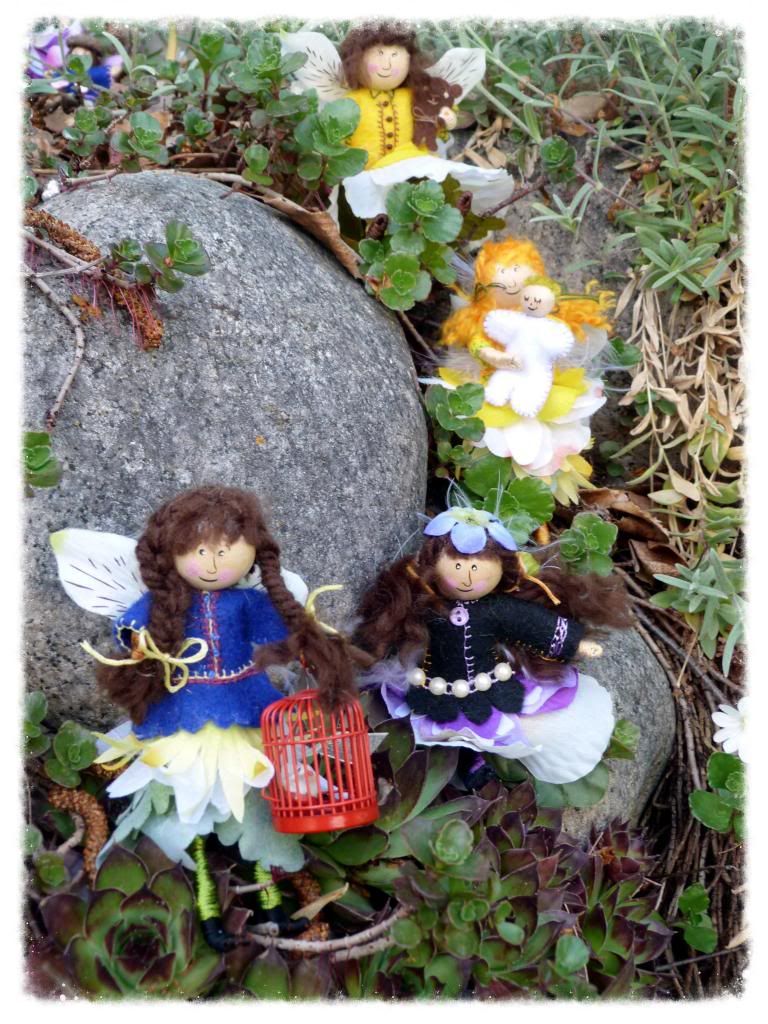
Three of my grandkids arrived with their mom this week to spend nearly a month at my house.  Needless to say, this Grandma and my husband (aka Grandpa) are thrilled to have them!  Below are some photos with the grandchildren participating in a little fairy magic. I hope this makes their summer a little more magical! Enjoy!  


Making Fairy Dust
Before you go, check out all the other fun posts going up today!
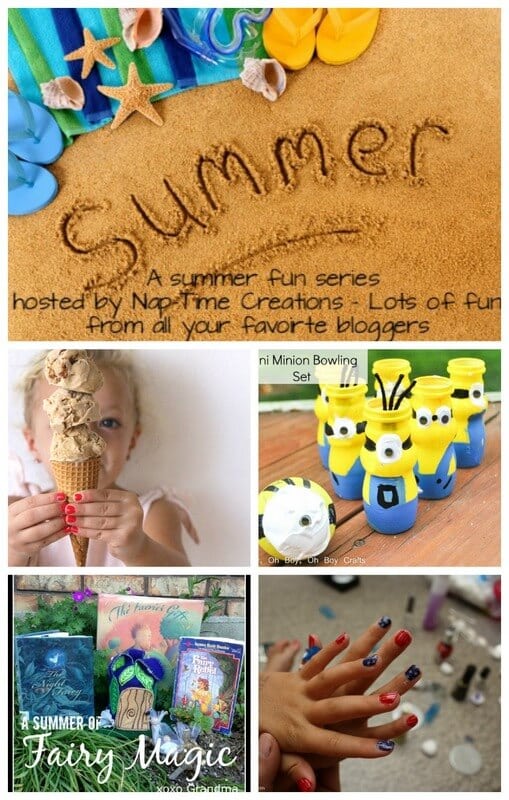
summer fun part 1
A Summer of Fairy Magic on Nap-Time Creations by XOXO Grandma
Nail Stamping Fun by Rae Gun Ramblings
Mini Minion Bowling Set Craft by Boy Oh Boy oh Boy Crafts
Cookie Butter Ice Cream from Kojo Designs

Enjoy your children and grandchildren this summer! - xoxo Grandma

Thursday, June 11, 2015

How to Make a Fairy Cottage - a Refashion


I loved making THIS fairy house so much, I've come up with another fairy abode I'm dubbing a "fairy cottage." This little cottage was made from a felted sweater sleeve (though feel free to just use felt).  With summer right around the corner, go ahead, cut off a wool sweater and shrink it to make this toy.  Join me in the fun and make one too!

Craft Supplies needed:  
  • Felted wool sleeve cut from a sweater.
  • 1 small container like a Gerber brand item
  • Scissors
  • Thread or glue
  • Embroidery floss
  • 1 button
  • Light green felt scraps for leaves
  • Dark green felt (9" x 9")
  • 3 silk flowers
  • 15 sequins
  • 15 small clear beads
  • Pins
How to make a fairy cottage:

  1. Cut a sleeve from an old sweater.  If it's not felted, just rinse the wool sleeve in hot water and throw it in your drier.  
  2. Cut openings from the container using the patterns found HERE.
  3. Cut off the excess of the sleeve from the bottom of the container leaving 1/3" extra length to attach to the leaf base.
  4. Cut the cuff of the sleeve into 3 equal pieces.  Make the edges of the cut pieces into points.
  5. Using the downloaded patterns (see step 2), embroider the edge of 3 leaves and sew onto the ends of the cut-up cuffs.
  6. Using the pattern, make a door as instructed HERE. See steps 8 and 11-14.
  7. Cut netting about 1/2" larger than the window openings.  Sew the netting from the back side of the cottage close to the edge of the window.
  8. With 3 strands of embroidery floss, embroider around the edges of the windows with a chain stitch and the edge of the door opening with a blanket stitch.
     9.  Make a closure across from where you want a door knob.  To make this,   Sew six strands of floss 3/8" apart and loop stitches all around the floss.  Then pull the tread tight.  Once the floss is covered with the tightly pulled loops, tie the thread off from the back side of the cottage.
     10.  Opposite the closure, sew on a button to the door.
     11.  Cut out the leaf foundation from two layers of felt and one of stiff interfacing.
     12.  Using a different colored green thread from the felt, sewing around the edge of the foundation, using a blanket stitch.  Use a blanket stitch to form the leave's shapes.  Then use a durable stretch stitch.  (This stitch gives the veins of the leaves more definition.)  To save time, I used my sewing machine for all this stitching.

    13.  Pull the sleeve over the container. Around the edges, using an epoxy, glue the cottage to the container.  
    14.  Now, the fun part, which to me is adding extra embroidered leaves and silk flowers to the cottage.  I sewed sequins onto the center of the flowers and secured them in place with small clear beads sewn on top of the sequins. Then I tucked and tacked down leaves as I played with my design.  If you don't want to sew the details down, you can simply glue these components onto your house.


This fairy cottage is so sweet and inviting. This toy can be used with welcome imaginative play or it can easily be turned into a night light by tucking in an LED light through the door's opening.  Please join me tomorrow at Nap Time Creations for more fairy fun.  xoxo Grandma

You also might like these posts:


Wednesday, April 22, 2015

How to Make a Fabric Fairy House - a Refashion & Tutorial


You are in for a treat with this project, because although it took me a while to create, this fairy house now tops my list of favorite creations! So who is ready to have more fun than you can imagine creating this gem using a shrunken sweater, a corn meal container and a few odds and ends from around your house? 


Supplies needed:
  • empty corn meal container
  • X-Acto knife or box cutter
  • embroidery floss: 2-3 shades of green, brown & beige
  • felt or felted wool sweater (a shrunken sweater)
  • 1 button (for door knob)
  • beads - from old necklaces
  • fabric water soluble marker
  • 9001 Epoxy Glue, clear
  • thread
  • scissors
  • small pieces of lace curtains or netting
  • optional items: decorative bird and or butterfly (I purchased mine from a dollar store)
  • green felt or felted wool for the leaves
  • 3 pipe cleaners
  • cut 3 pieces of green felt 7/8" x 13", cut one end of each piece like this: 


Download templates for the door, window and leaf foundation color patterns HERE and the basic house pattern HERE.  

Cut two fairy house leaf foundations from felt and one from stiff interfacing.


1.  Draw the door onto a corn meal container.
2.  Turn the container upside down, using a sharp box cutter or X-Acto knife, cut along the door lines.
3.  Tape the windows in place and draw around the window pattern.  
4.  Cut the windows out with the box cutter.


5.  Wrap the felted sweater around the container. Cut enough fabric so it goes around the container and add at least 3/8" for a seam allowance.  Cut the felted sweater as follows:
Now, pin the door onto the fabric and cut out the door opening.
6.  Pin the window pattern directly over the cut out on the container.  Trace around the pattern with a fabric marker.
7.  Cut a small hole through the back side of the fabric and cut around the traced pattern.
8.  Cut out the door from felt. With a fabric marker, trace the wood lines onto the felt.


9.  From old lace curtains (or netting) cut 3/4" overall larger than the window pattern.  Pin over the window openings and sew in place.
10. Using two contrasting colors of embroidery floss, chain stitch around the openings of the windows.
11.  Sandwich interfacing between the 2 felt doors and pin. Zig zag using various widths the wooden lines onto your door. 
12.  Finish the edge of the door with a blanket stitch.


13.  Stitch the fairy house together to form a circle. Using a straight stitch, sew the door to the left side facing on the door opening.
14.  Blanket stitch all the way around the door (I hand embroidered this area.).
15.  Pin the door over the cut out area.  Add elastic cording by machine stitching to the right side facing of the door 3" from the bottom. Add random beads around the door opening.  Hand sew a button for a door knob to the door.
16.  Sandwich interfacing between the fairy house leaf foundation and sew around the edge at 1/4". Now sew the centers of the leaves. See the pattern for all the leaf details. This pattern is the actual size of the foundation.


17.  Blanket stitch the felt around the pipe cleaner.  


18. Pin the leaves to the top of the fairy house.
19. Stuff the felt vines into the hole at the top of the house.
20. For the rose leaves, make a stem that you'll attach the leaves to by cutting off some of the "fuzz" from the pipe cleaner.  Then apply some tacky glue to the pipe cleaner.  Now, wrap reddish brown embroidery floss all around the pipe cleaner.  I wrapped 3 1/2" inches for my stem.  Add the rose leaves to your house and glue on a rose or two.  
21.  Put strong adhesive all around the outside edges of the corn meal container, especially the windows and door.  Pull the house over the container and press the edges into the glue.


22.   I added paper clips to the door area to hold the house tightly against the corn meal container.  Set the house aside and let the glue dry.
23.  Add the house onto the leaf foundation and pin in place.
24.  Sew the leaf foundation to the house.
25.  If desired, add a few additional extra leaves, a butterfly and or a bird to your house using your adhesive.


26.  Create several fairies and watch your child or grandchild have fun!  For fairy creating tips see THIS post.


This fairy house is for that child in your life that likes playing in a world of make believe. You can turn this into a darling night light by tucking an LED light through the door. Just look at the soft glowing light that comes through the little windows once the light has been added:


Take your house outside for a while and see if any fairies want to take up residence in this cozy, whimsical little home.


If you don't want to take the time to actually make a fairy house but love this one, please stop by my Etsy shop.  xoxo Grandma