A few of my granddaughters are getting a play kitchen for Christmas, and their mom asked if I would make some felt food to go along with it. I knew it would take a while to make these items and since I had to ship them to her, I worked all Thanksgiving weekend to crate these delectable but non edible treats.
Click on the description under each photo for a link to my personal favorite free patterns which I used to make these felt food delicacies.


Strawberries, Donuts....

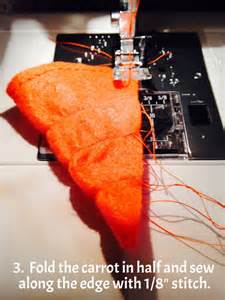
Carrots.....


Slices of cake....(This kit came from a 100 yen store. If you're lucky enough to visit Japan, make sure you visit these stores.)


and oranges.
I think my food turned out pretty fun looking. Hopefully my little granddaughters will enjoy playing with it as much as I enjoyed making it.
Happy gift making. xoxo Grandma